Showing posts with label Scallop Edge Border punch. Show all posts

Wednesday, 12 September 2012

Happy Anniversary


Good morning everyone. It was my 5th wedding anniversary last friday and this is the card I made for my wonderful husband:


I used the Pedal Presents stamp set and have only just realised that you can no longer get this. It was a hostess set in the summer mini catalogue but, wait and see, there may be something similar in the new catalogue coming out in October .... The Adorning Accents Embossing folder which has the hearts as 1 of 3 embossing folders was also in the Summer mini but will be back in the 2012-13  catalogue. Here's a closer look:


I used Real Red for the base card and Pretty in Pink for the border which was punched with the Scallop Edge border punch. The small hearts were from the Owl Builder punch. They were the size that fitted best. Just for a change, I decorated the inside of the card too using the heart stamp from the Tiny Tags stamp set. I also used the word 'husband' from the All in the Family stamp set. The Happy Anniversary has sadly been discontinued. Can you see the crease in the paper? I didn't notice it till it was too late but it didn't look so obvious once I'd written the card:

Now, I have to tell you that my husband is much more romantic than I am and he does all the cooking. So, on friday - which was a hot day, I came home to find he had prepared a special meal and had set the table outside (he could only find a Christmas table cloth).

 
 He had added some bows and little bubble champagne bottles which were left over from the wedding and had found a bottle of Champagne which was left over from our honeymoon. (I can't get the picture to turn the right way up but you get the gist)
 
 
As you can see he'd also bought me a beautiful orchid and in the little pink gift bag was an i-pod shuffle for me to use at work. Isn't he great? Check back soon for some great cards made with my new favourite set from the autumn/winter catalogue - Owl Occassions. x


Posted by Picasa

Sunday, 1 July 2012

Apothecary Art - final offering

Hi everyone, this is the final card we made in class on Wednesday. I hope you're not bored of the Apothecary Art stamp set yet. This one is simple but effective:


This shows the luscious pleated ribbon in all it's glorious detail:


The middle circle was coloured and then punched out, using the 1" circle punch. The rest of the colours and tools are the same as before:


Here are all the cards together. The sun was just peeping in, reflecting on the window but who's complaining when we finally get a bit of sun eh?

If you fancy joining us at one of our card classes, please don't hesitate to contact me. It only cost £12 to make all these lovely cards and have lots of fun. x 

Monday, 11 June 2012

Happy Birthday Bike

Hi everyone, we had 2 birthdays in our family yesterday, so here's the card I made for my Father-in-Law. I used the  Pedal Presesnts stampset which is a hostess set and I love it. The bike comes with a variety of things you can put in the basket, so it can suit any occassion. For this card I've used the presents and balloons:


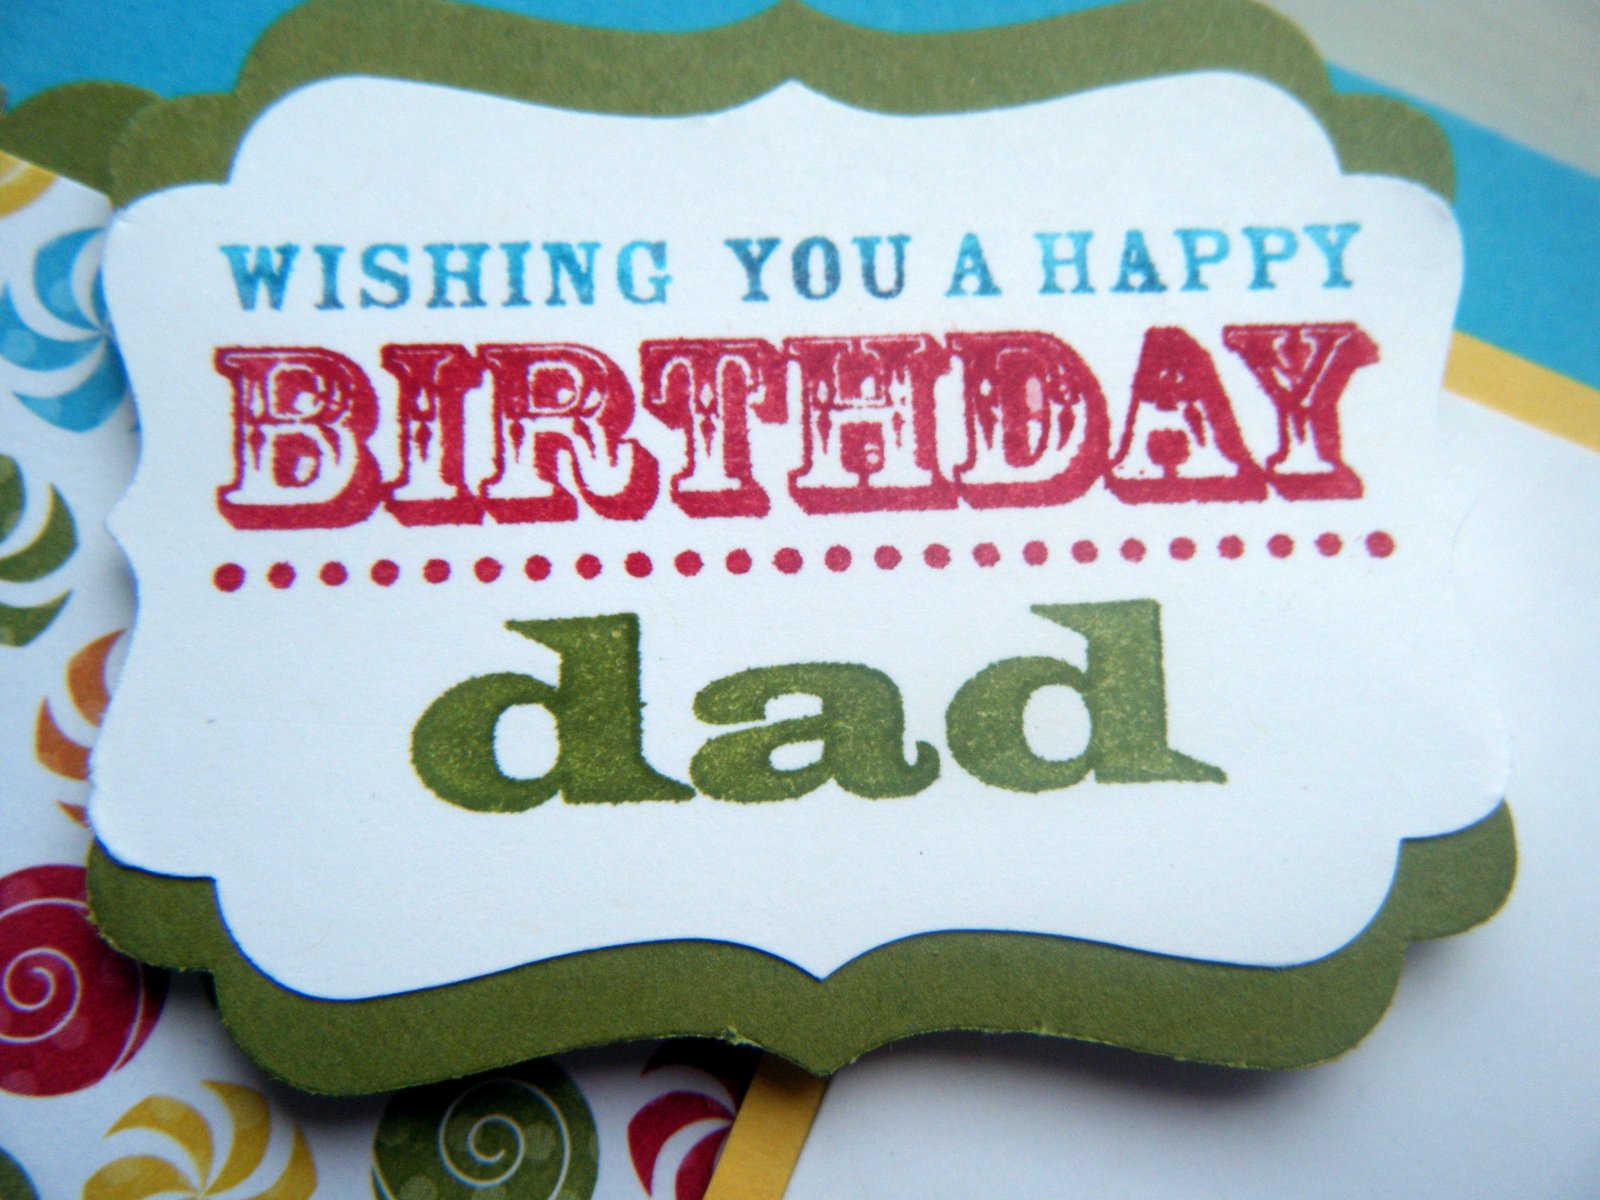
I've used another hostess set, Happiest Birthday Wishes, for the greeting and added 'dad' from the For My Family stampset. This stampset lets you personalise any greeting and I think it worked really well. I used the Decorative Label punch to cut out the greeting and then mounted it onto an Old Olive punched Decorative Label:

The card base was made out of Tempting Turquoise cardstock with a Whisper White panel mounted on a Daffodil Delight layer. I used a strip of Big Top Birthday designer paper, which has lots of bright colours in it. The edging was made with Old Olive cardstock, punched with the Scallop Edge border punch. Finally, I covered the balloons in Crystal Effects to make them lovely and shiny:

I hope you liked this card. If you fancy hosting a party to earn some of these hostess sets, please get in touch and don't forget you can earn an additional £30, during June and July. Check out my post from the 2nd June, if you missed the details. I'll be back soon with the second birthday card. x

Monday, 28 May 2012

Aviary (3) - Three bird cages

Hi everyone, here's the last card from the Aviary card class: 
 

The cages were stamped in Basic Grey ink and the colour scheme was Pumpkin Pie, Old Olive and Melon Mambo. The flowers were punched using the flower punch from the Itty Bitty punch pack:

Here's a close up of the flowers. The green edge has been punched with the scallop border punch:

I stamped the inside of the card too, with a row of birds. This is a terrible photo but you get the gist (I hope). Right, you've seen all the cards from card class now, hopefully you've enjoyed them. The next  card class has a masculine theme and takes place on Wednesday 30th. Let me know if you fancy joining us. x
 
Posted by Picasa

Thursday, 17 May 2012

Aviary - Card 2.

Hi everyone, apologies for not blogging for a while. I've done 2 fairs this week and now I'm not very well with a nasty cold. Still it gives me a bit of time to do some typing. I bet you thought I'd forgotten about the Aviary cards but I haven't. Here's the second of the Aviary cards which we made at the last card class. This one use the oak tree from the Lovely as a Tree stamp set, as a fern. Have a look:


I used Old Olive, Melon Mambo and Always Artichoke cardstock. The foliage of the oak tree was inked using old Olive, taking care not to ink the tree trunk. An Always Artichoke marker was then used to dab spots of darker green onto the stamp, to create depth. The small stamp from Lovely as a Tree (just 2 leaves and a pine cone) was stamped round the edges, creating a 'fern leaf look'.  The birdcage was then stamped on top of the 'fern' in Basic Grey ink, which looks less stark than black (although in the photos it looks like blue) Here's a closer look:


The greeting is from the Teeny Tiny Wishes stamp set again. I've used the gorgeous dotted scallop ribbon in Melon Mambo and the fllower was punched using the Boho Blossom punch with a rhinestone in the centre for a bit of bling. Here you are:


The scalloped edge was punched using the Scallop Edge Border punch. If you fancy making these cards and need any products, then please get in touch. x

Saturday, 14 April 2012

Cupcake Bakery

Hi everyone, here's the second card we made using the Create A Cupcake stamp set. This time it's a cupcake bakery - at least that's what I call it. Here you go:

I didn't want to go for surgary colours so went for these colours instead. Actually they are still quite sugary. I used Pink Pirouette for the base card and Rich Razzleberry and Island Indigo for the contrast colours. The cupcakes were stamped in a variety of colours and punched using the Cupcake Builder punch. the canopy was created using the Word Window punch. Here's a close up of the cupcakes:


And the next photo shows a better view of the 3D effect of this card. The scalloped edge on the 'shelf' was created by punching the edge with the Scallop Edge Border punch.


I'll be back with the last card soon. x