Showing posts with label Sincere Salutations. Show all posts

Monday, 3 September 2012

Fly away butterflies....

Hi everyone, today's card show cases some of the retiring products. Both the stamp set Flight of the Butterflies and the butterfly punch are going. Here's a reminder of how lovely these products are:
 

To make this card I used a Colour Q colour challenge. You can sign up to this and every week you get a photo which has inspired a colour combination. I've never used these prompts before and they may be quite old as they use a colour that is no longer available, Bermuda Bay (I decided it was similar to Pool Party) Here's the original photo:
 
 
As I've already said I used the Flight of the Butterfly stamp set and matching punch. I also used the Sincere Salutations stamp set for the greeting. This set is also being retired which is a big loss as I use it all the time.
Here are the flowers which were punched using the Boho Blossom punch, which is staying:
 
 
The background shapes were cut using the Big Shot and the Framelits Labels Collection. Here's a closer look:
 
 
If you want any of these products, then please don't delay as some are already sold out. x


Thursday, 30 August 2012

Last 2 days

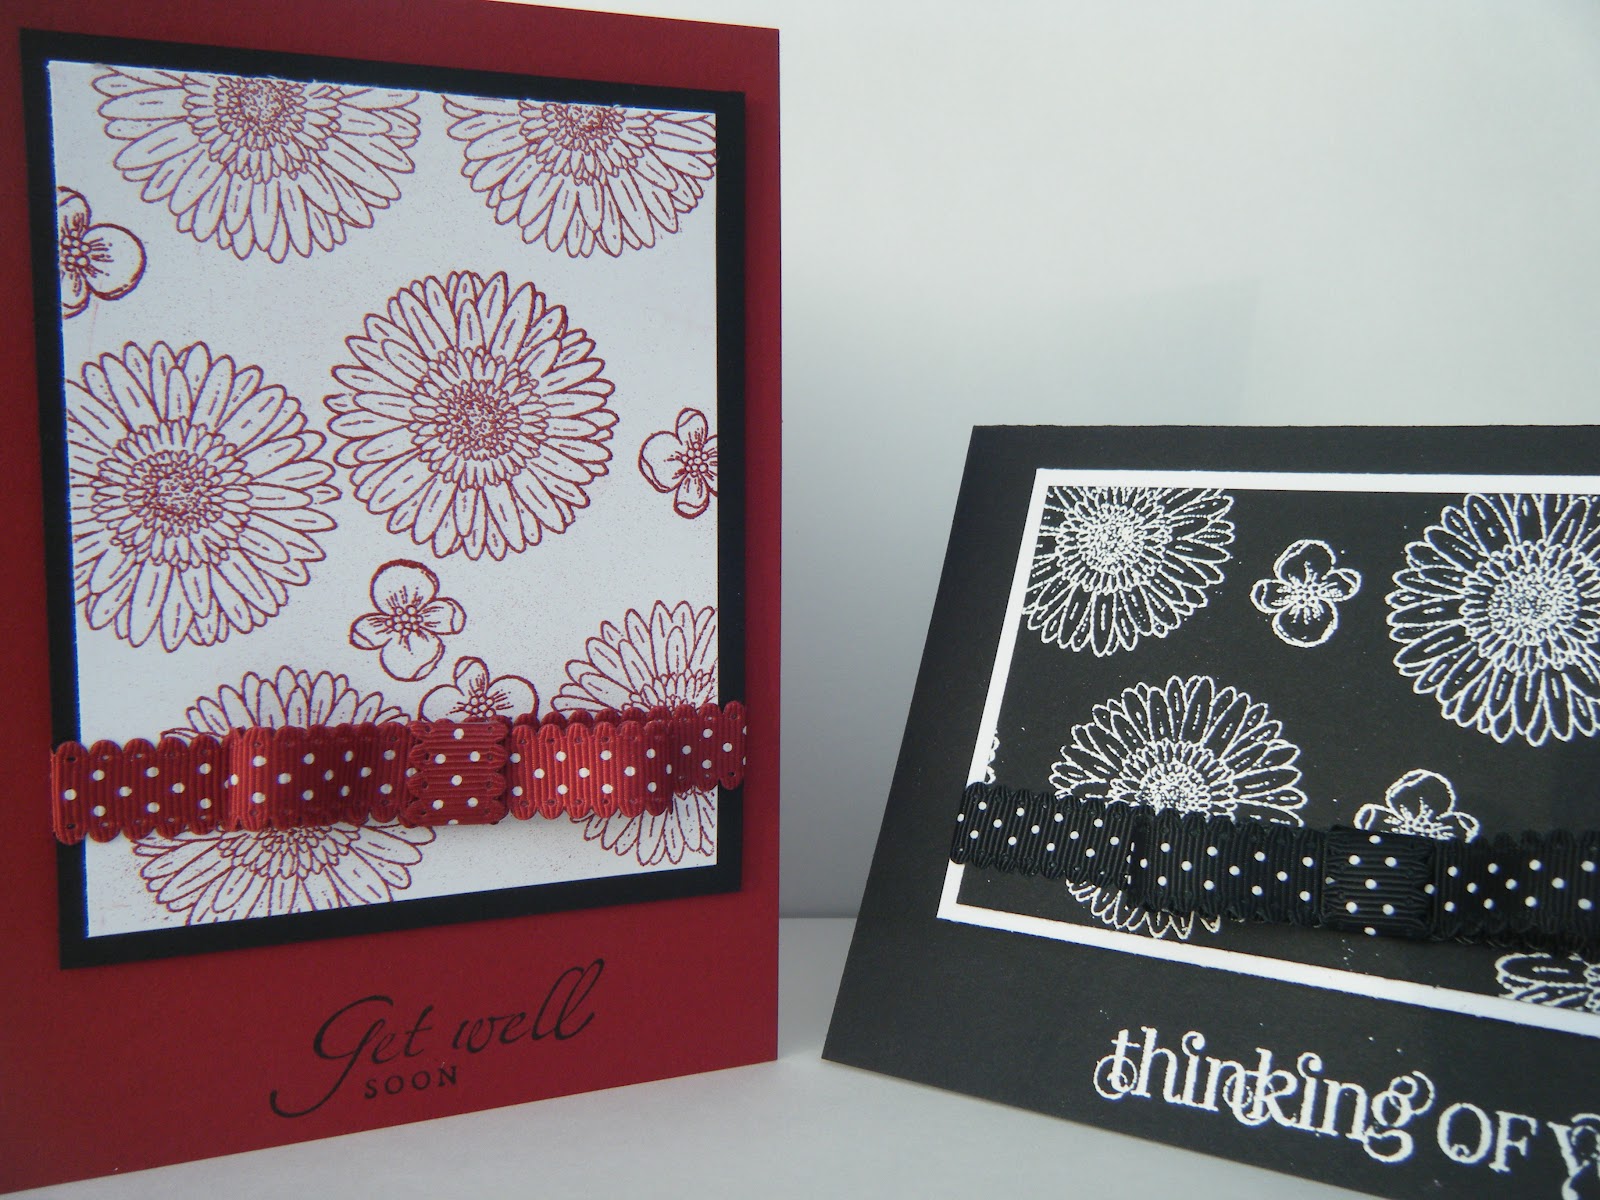
Morning everyone, as promised I have 2 cards to show you today, made with the other flowers from the Reason to Smile stamp set. Here is the first one:

I used Cherry Cobbler cardstock for this one. I stamped the image in Versamark ink and heat embossed it using Cherry Cobbler embossing powder. Hopefully this gives you a better view and a close up of that gorgeous Scalloped Dots ribbon - also in Cherry Cobbler.


You can get the Reason to Smile stamp set for free if you place an order of £60 or more before the end of August or you can buy it BUT only till August 31st.

Here's another card. This time I used Basic Black card stock and again stamped using versamark ink, but this time I used white embossing powder:


And the inevitable close up:


Here are both of them. I must admit I quite like simple colour schemes like this. The sentiments were from Sincere Salutations and Curly Cute.


If you want this set or anything from the Summer mini, please contact me before the 31st August so I can place your order. I'll be back soon with news of our Autumn/Winter catalogue which launces on September 1st and has lots and lots of fantastic seasonal porducts. Check back on the 1st so you can have a look. x

Thursday, 16 February 2012

Get well Mum

My mum is having an eye operation next week, so I've made her a Get Well card in advance. My mum loves birds and I have just treated myself to the Aviary stamp set. This set is great!!. You can just play about and have birds in the cages, out of the cages, it's a lot of fun. The Nursery Nest Designer Papers also match the set, although I haven't used them in this card:
I used Pool Party, Soft Suede and Whisper White for my colour scheme and I love how it turned out:


I used a bit of bling on the cages and the Scallop Ribbon Border punch to create a Soft Suede edge to the Pool Party Ruffled Ribbon. I then used one of the Lots Of Tags dies in the Big Shot to cut the tag out of Pool Party and punched a Modern Label shape in Soft Suede. The Get Well sentiment is from Teeny Tiny Wishes. 

The stamp set has a gorgeous little owl image which I just had to use but it didn't really suit the card front - so I used it on the inside of the card. The inside sentiment is from the Sincere Salutations stamp set:

Oops, I've just noticed that I haven't rubbed out the pencil line yet. I used my Stamp-A-Ma-Jig to position my owls in a perfect line. It makes this sort of thing very easy. I hope you like this card. I enjoyed making this card so much, I also made a birthday card using the Aviary set. Check back soon for details. x 

Posted by Picasa

Sunday, 4 December 2011

Vintage Birthday Greetings

Good morning everyone. A birthday card from me today. I have finally got round to using my Beautiful Wings Embosslits die. I have had this die for a while but just haven't had time to use it. Now that I have though, I have fallen in love with it. This die cuts the most beautiful, dainty little butterflies and embosses them, at the same time. This die is not to be confused with the Beautiful Butterflies die, which cuts larger butterflies which can actually be used to make a card base.


I used Cherry Cobbler for my base card and First Edition speciality papers for the panel on top. These papers are great value as you get 24 sheets instead of 12, so double the amount for your money. I ran the First Edition panel through the Vintage Wallpaper embossing folder and the Big Shot, after I had inked the embossing folder with Crumb Cake ink. It is difficult to see in the picture but it makes the background of the panel a nice 'crumb cake' colour while the raised embossed pattern remains vanilla. I stamped a strip of Cherry Cobbler with the background stamp from the Creative Elements stamp set, and edged it using the Scallop Trim Border punch.

I then used the Sincere Salutations stamp set for the greeting and the Decorative Label punch to cut it out and to create the Cherry Cobbler border.

I added some Pearls and the wonderful Crumb Cake Seam binding to give it the finishing touch. Everything was sponged with either Crumb Cake or Cherry Cobbler ink to give it a bit of definition round the edges and I scrunched the ribbon to give it a 'vintage' feel.


I stamped the inside with my favourite butterfly from the Creative Elements set and used the Scallop Trim Border punch again.
I made this for a colleague at work and she was very pleased with the result. Check back soon for another card made with the Beautiful Wings Embosslits die. x

Wednesday, 30 November 2011

A Paisley Get Well

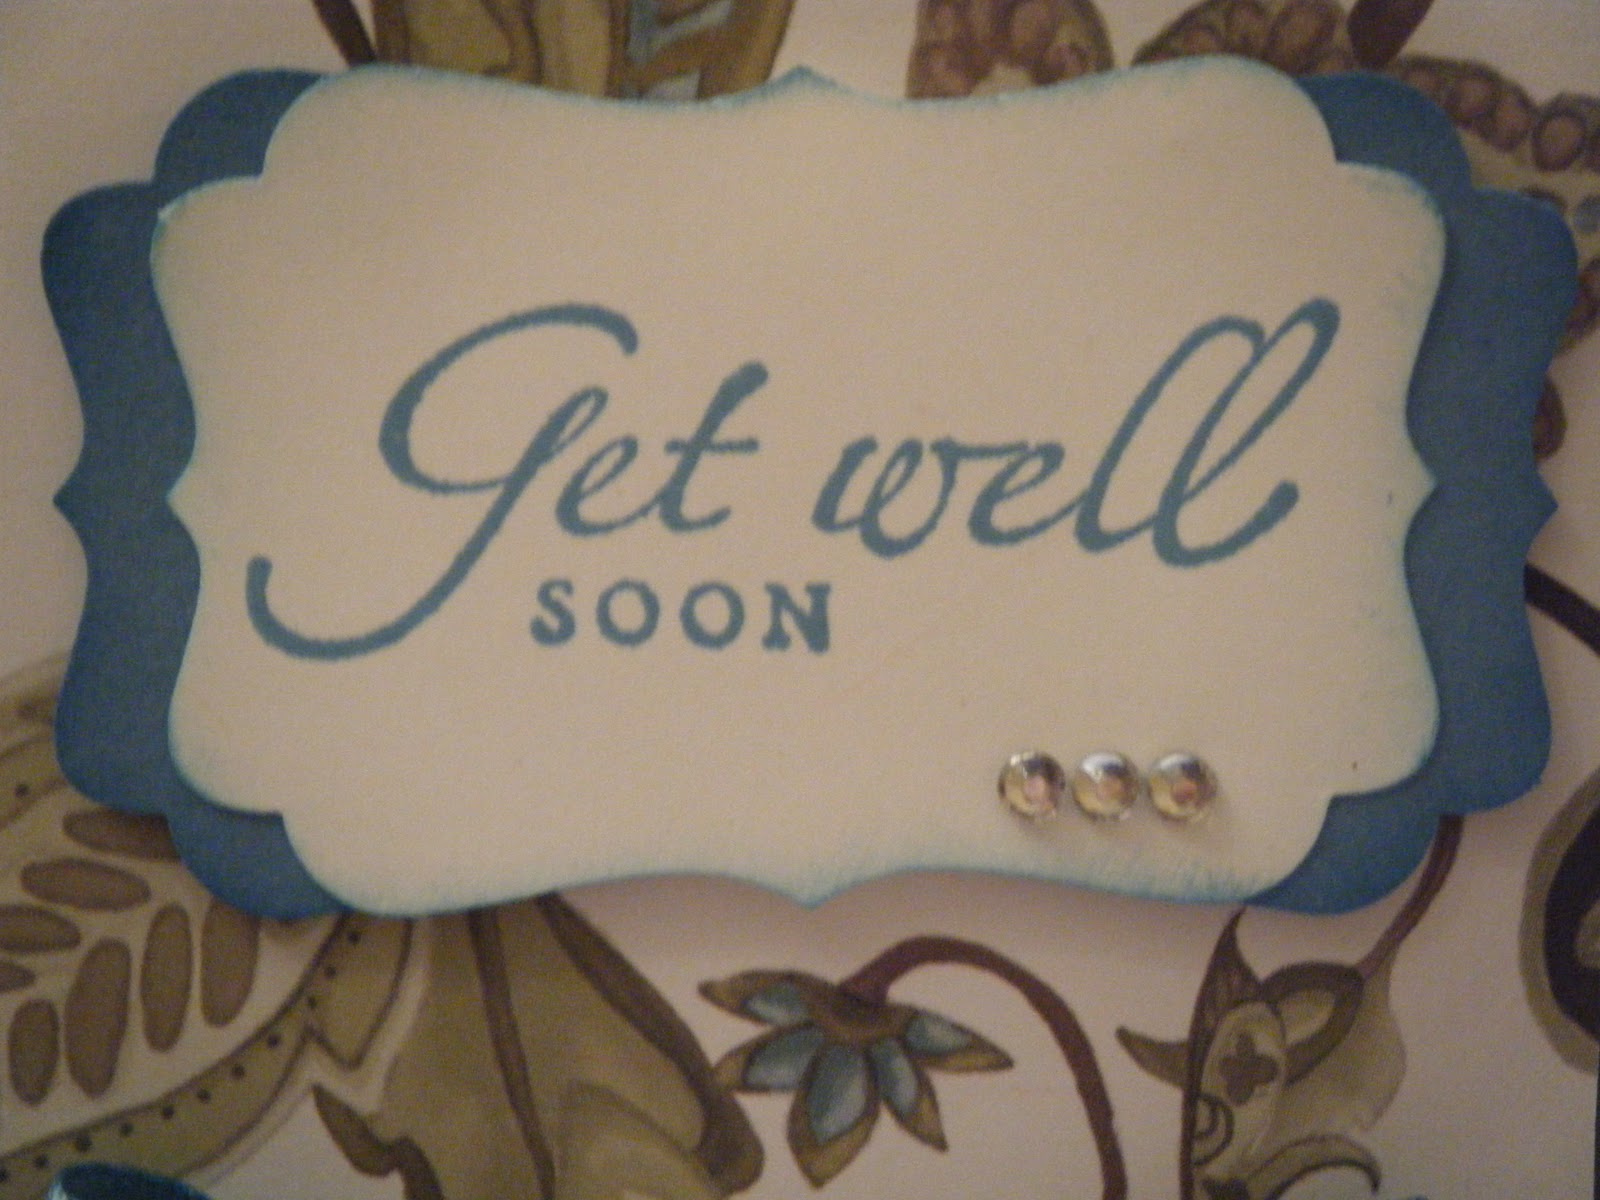
Hi everyone, I wanted to share this Get Well card with you. I made this for one of my regular card class ladies, who has been feeling under the weather recently.


I made this card using the Paisley Petal Designer papers. I love these papers. the colours are so rich and there are lots of different colours in the papers, so you can choose your own favourites for the base card and detail. There is also a matching Paisley Petals stamp set, but I haven't used it on this card.

I used Always Artichoke for my base card and Marina Mist for the ribbon and the card behind the greeting, which was stamped with the Sincere Salutations stamp set and punched out with the Decorative Label punch. To get the 'double layered punched effect'  I punched  a label in Marina Mist and then cut it in half. You can then place it behind the stamped label, to give it a coloured base which helps it to stand out.

I used Marina Mist ink, so it all matched, and added a bit of bling in the form of  3 Rhinestones.
 

I also decorated the inside of the card by using the Scallop Trim Border punch on Whisper White card and stamping it with the butterfly from the Creative Elements stamp set. I love this butterfly and you will see it on some cards soon.


I hope you liked today's card. I've had a bit of a session so will have more to share with you over the next few days. Hope to see you back soon and remember, if you want any of these goodies for Christmas, contact me before the 7th December. x


Wednesday, 12 October 2011

Sail Away, Pennant Card

Hi everyone, many apologies for not blogging for a while. Everything seems to be crazy busy at the moment. As you know, I've been promising you sneak previews of the Pennant Parade Card Class for ages. Well, unfortunately, because Stampin' Up! is so busy at this time of year, due to the new catalogue launch, the order took longer to arrive then I had anticipated. This means that the card class is tonight and I was still making samples late last night as my order did not arrive until 8pm on monday. (lesson learnt for next year)

So, instead of giving you sneak previews, over the next week I'm going to show you the cards we will be making tonight. I'll show you each card in detail and if you fancy making them, contact me to order your supplies. These cards will be on display at my launch party which I'm holding this Saturday 15th, 10.30-12.30, so if you fancy coming along and having a go yourself, contact me on 07970 708348.

Here is the first card made with the Pennant Parade stamp set and matching Petite Pennants Builder punch . It's hard to tell, as the stamping quality is so good when you use Stampin' Up! papers, but the sails were stamped using the stamp set and then punched out, using the Petite Pennants Builder punch.


To make this card, cut some clouds out of Pool Party (new in-colour for 2011-2013) and stick them onto Whisper White. Run this through the Big Shot using the Square Lattice Embossing folder and fix to a Chocolate Chip card base. Then use the 1 3/8"  circle punch to create the waves in Pool Party. I have inked the edges with Pool Party ink.

Use the extra large oval punch and Chocolate Chip card stock to make the boat. I embossed some lines it on it to make it look like 'planks'. Cut the top bit off to create a boat shape and use a little bit of Chocolate Chip for the mast. Stamp your sails onto Whisper White, I used Calypso Coral and Lucky Limeade ink - both are new In-Colours and then punch them out.
Posted by PicasaThis photo shows you the waves a bit clearer. I finished my card off with a bit of ribbon as a flag, with a flower in Island Indigo (another new colour), punched using one the Itty Bitty Shapes Punch Pack punches. I added a Rhinestone to the flower and stamped a birthday greeting from the Sincere Salutations stamp set.

I hope you liked this card. Back with a Christmas card using the Pennant Parade stamp set and punch later. 

Monday, 5 September 2011

Thank you, from Felix

Hi All, I thought I would show you a card made with a soon to retire product - the xxxx jumbo wheel. I love this wheel and am a bit gutted that it is going, as I've only just got it. It's so handy for 'New Home' cards and goes really well with the 'All in the family' stampset.

As you know, we went on holiday in the summer, but what you don't know is that we have a very demanding cat called 'Felix'. He constantly wants attention; treats; someone to stroke his tummy; running water out of the tap - you get the picture. So when we go away on holiday, we like someone to come and stay in the house to look after Felix. This year  a lovely girl that I work with, volunteered to stay. This is the card I made her to say 'Thank you'


I stamped the Neighbourhood wheel in black onto watercolour paper, and then coloured it in using my ink pads and an aqua painter. I am absolutely no expert when it comes to watercolouring (as you can tell) and my houses seem to have a definite lean to them, but I had fun colouring. I stamped the cat image from 'All in the family' onto a separate piece of whisper white, layered it with a basic black scalloped circle, and coloured the cat to look a bit like Felix. He's got the same silly expression on his face!


The greeting with stamped in black using  the Sincere Salutations stamp set. This set will also be around next year which is great news as I use it lots.

I have made my daughter a card using this same wheel as she's just moved into a new flat. so I'll show you that later in the week. Don't forget if you want any products on the retirement list, let me know ASAP as they are selling out fast. See you soon. x

Monday, 1 August 2011

Happy Birthday Mum

It was my mum's birthday at the end of the month and this is the card I made her. I am really pleased with the way this turned out, and know she loved it too.


This card was based on a card by Michelle Last and she has a useful tutorial on her blog, showing you how to make the flowers. You will find it here. Michelle's card was in blue which I personally love but my mum doesn't really like blue, so I made her a pink version. I used Regal Rose cardstock, ink and designer paper, contrasted with Crumb Cake.


The flowers were stamped using the Flower Accent stamp (£7.95) and the 'Rock and Roll' technique. This means inking the stamp with Regal Rose and then 'rolling' the edges in Crumb Cake, giving the edges of the flowers some definition. The flowers were then cut out and covered in Crystal Effects, sprinkled with glitter and some Basic Pearls were added to the centre. Once dry, the points of the petals were curled and shaped. Leaves were cut using the Little Leaves die and the Big Shot, in Crumb Cake.


The background was stamped on Very Vanilla using Crumb Cake ink. I used the Notably Ornate and Vintage Vogue stamp sets. I then sprayed the card with water and scrunched it up. I tore the edges and inked them with Crumb Cake.


The greeting was stamped using one of the Sincere Salutations Greetings, embossed in gold, and punched using the Oval Extra Large and Decorative Label punches.

Have a go at this card yourself. The results are beautiful.