Showing posts with label For my Family. Show all posts

Tuesday, 26 February 2013

Topsy-Turvy Celebration - From Disaster to Perfection

Good morning everyone, I thought I would give you a rest from Sale-A-Bration cards today and show you something different. It was my step-son's 16th birthday recently and I wanted to use one of my new stamp sets, Topsy-Turvy Celebration. This is what I made for him:


Do you ever have one of those days when everything goes wrong? Well that is what it was like making this card. First of all I spent ages stacking my cakes by masking them and adding the number candles. I then moved on to the greeting and didn't watch where I put my 'inked' piece of plastic that I use with my Stamp-A-Ma-Jig and this was the result:


What a mess. I tried doing it again but that didn't go too well either so in the end I decided to cut the cakes out. I  mounted them on some 3D pads on the inside of a Midnight Muse card. I die cut a backgrounf frame of Gumball Green, using the Framelits dies:


Next I stamped the greeting. I was really pleased at how well I managed to get the numbers from the Memorable Moments set to line up and then I stamped 'Son' from the For My Family stamp set. All it needed was 'birthday'. Look what happened - aaargh:


I had to do it all again:

I used one of the Framelits to cut out an aperature from the front of the card and stamped 'Celebrate' on the inside which I embossed with white embossing powder.  


I was actually very pleased with the end result, and so was he, but it took far longer than it should have. x 
 
 
Posted by Picasa

Wednesday, 13 June 2012

Simply Scored Birthday

Hi everyone, as I've mentioned we had 2 birthdays at the weekend. Not only was it my father-in-law's birthday, it was my son's 23rd birthday too. I made him this card, using my new Simply Scored tool:


Now I have to confess that I'm not totally sure about this card - I couldn't decide whether it was missing something or whether it was fine as a 'clean and simple' card. Anyway, I resisted the temptation to mess with it and left it as it was.

I used the Simply Scored tool to score 2 strips of Big Top Birthday designer paper every 1/2" . I glued the strip together and then flattened it into the rosette shape. The greeting is from the Up, Up & Away stamp set which is in the Summer mini catalogue. 


For the greeting inside the card I used the Happiest Birthday Wishes stamp set which is a hostess set. I coloured each line with marker pens which matched the paper colours and added 'son' from the For My Family stampset.


Well, that's it for the birthday cards from the weekend but my mother-in-law's 70th is fast approaching. I'll post her card on here in a couple of weeks. x

Wednesday, 6 June 2012

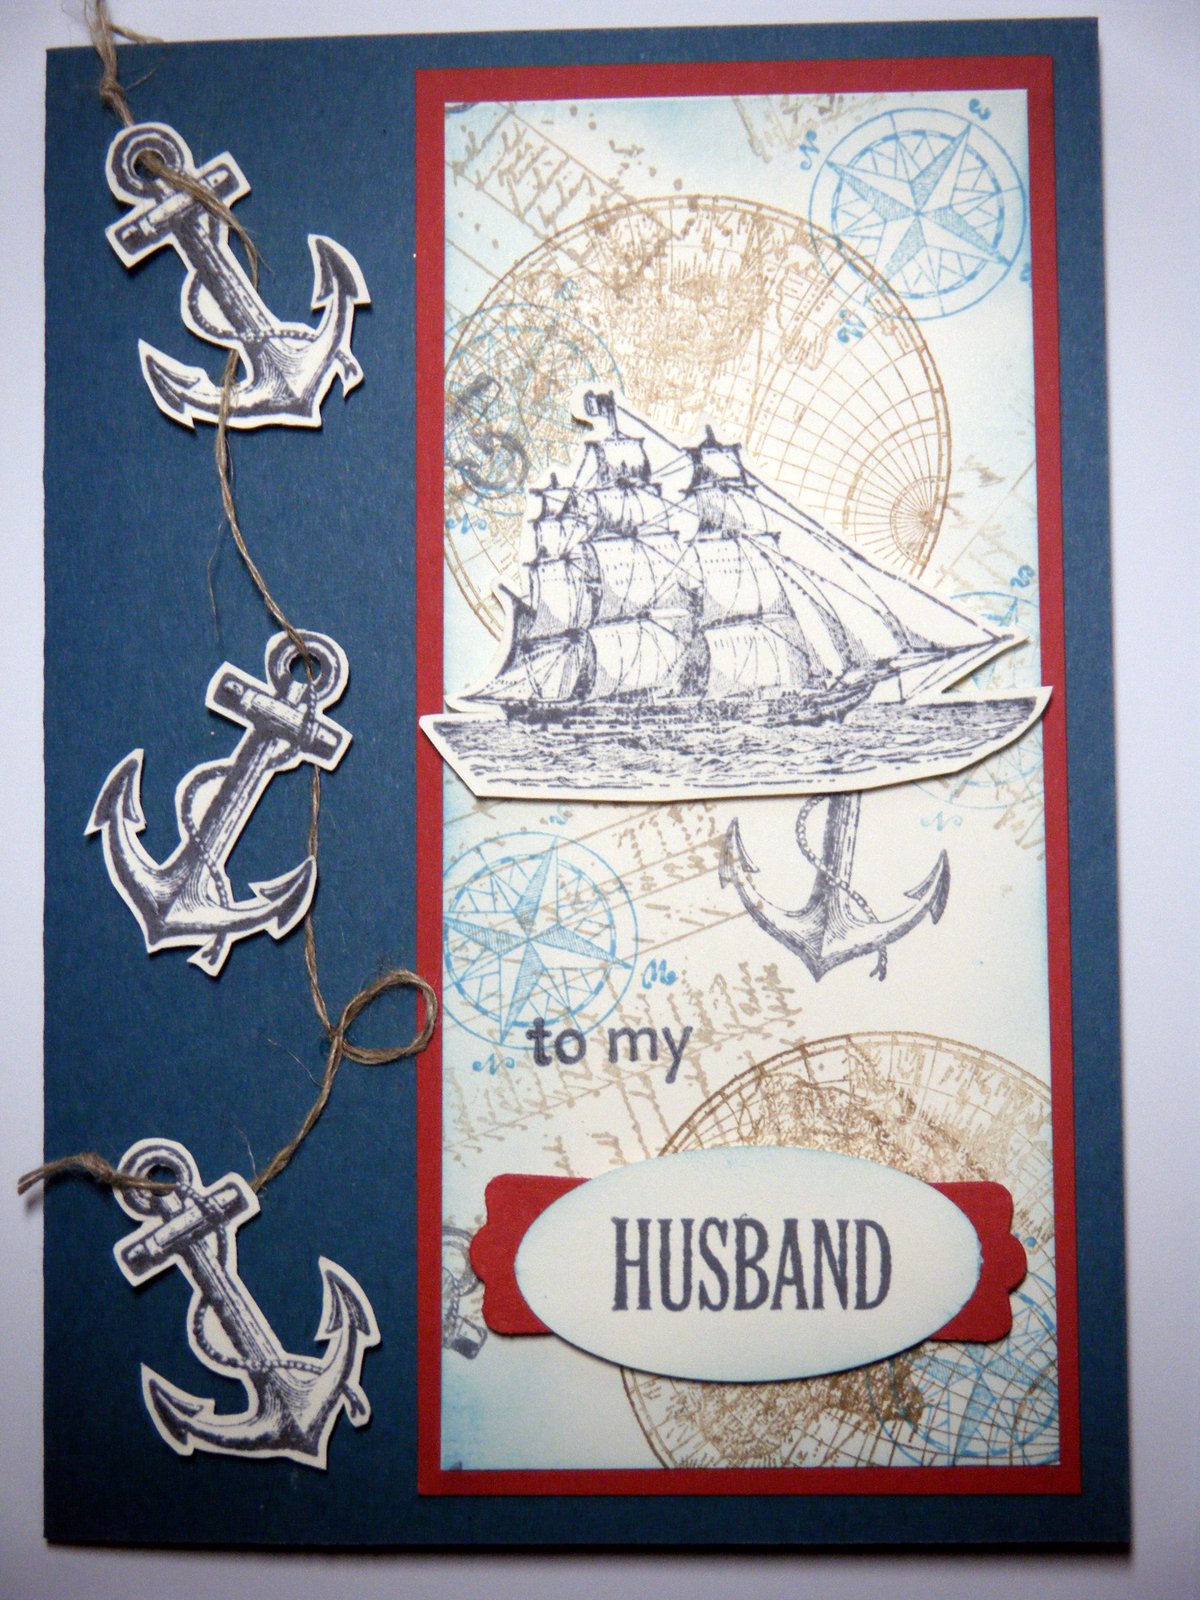
Anchor card

Here's the second of the Masculine cards we made last week. It uses the same colour scheme of Not Quite Navy and Riding Hood Red. This was a smaller A6 card:


Again we have used a piece of the One Sheet Wonder to create the background panel. I stamped 3 anchors and the ship in basic grey and cut them all out. Sadly there are no matching punches for these but I quite enjoy a bit of hand cutting:


I used Linen thread to tie the anchors together. For my Husband was stamped using the For My Family stamp set again. I stamped 'husband' on to a Large Oval and popped that onto a label punched with the Modern Label punch:

 If you would like to buy any of these products, then please get in touch. Next time I'll show you the notebook we made as a small gift. x

Tuesday, 5 June 2012

Large father's day/birthday card

 Hi everyone, this is the first of the masculine cards we made in the last card class. This was a large card, A5 size, which we don't do very often:


For some reason that I can't work out, there seems to be another photo superimposed onto the photo above. We used the Open Sea stamp set to create a background sheet (often called a 'one sheet wonder') I used Crumbcake, Basic Grey, Soft Suede, and Marina Mist ink and used all of the stamps included in the set.

I used Not Quite Navy and Riding Hoodl Red cardstock to give it a slight nautical (and patriotic) feel. The boat was stamped in Basic Grey which gives it a softer look than black. We used the wide Marina Mist Grossgrain ribbon and added a strip of Not Quite Navy card punched with the Dotted Scallop Ribbon border punch. Here are a couple of close ups:


'To my dad' was stamped using the For My Family stampset which is a very usual set for adding family titles to cards.

And here's exactely the same card, just with a different greeting. This 'Happy Birthday' is from the Curly Cute stamp set.


I have to admit that this card was almost a straight copy of one that Sally-Jo showed at the Stampin' Up! regional training event in Leeds. She's a truly talented, artistic lady and you can see some of her work on her blog here.

I hope you've enjoyed this card. I'll be back with another one soon.
Posted by Picasa

Tuesday, 14 February 2012

Happy Valentine's Day

Oh dear. Valentine's Day is nearly over and I'm only just posting this. I was planning to do it this morning but I didn't get a minute. Here is the card I made for my husband:

I saw something similar on the internet ages ago but can't remember who made it, so I can't give any credit. This card was made in Cherry Cobbler and Whisper White cardstock. I punched out lots of leaves, using the Bird Builder punch and then drew a heart shape on my card, after I had put it through the Big Shot with the Vintage Wallpaper embossing folder. I then stuck the leaves down, following the heart outline:


I punched 2 birds from Whisper White and very lightly inked the edges with Crumb Cake ink - just enough to make them stand out a bit. I then stamped the sentiment using my new For my Family stamp set. This contains lots of great words which you can use to personalise any card. The sentiment was punched out using the Modern Label punch:

Naturally the card wouldn't have been complete without a reference to Valentine's Day so I used the Valentine's sentiment from the You Are Loved stampset and stamped it on the inside of the card:

Posted by Picasa
I hope you like this card. It could be used for all sorts of occassions, including weddings and the colours could be matched to anniversaries, bridesmaids dresses etc. Remember, if you would like to buy any of the products, just give me a ring. x