Wednesday, 30 November 2011

A Paisley Get Well

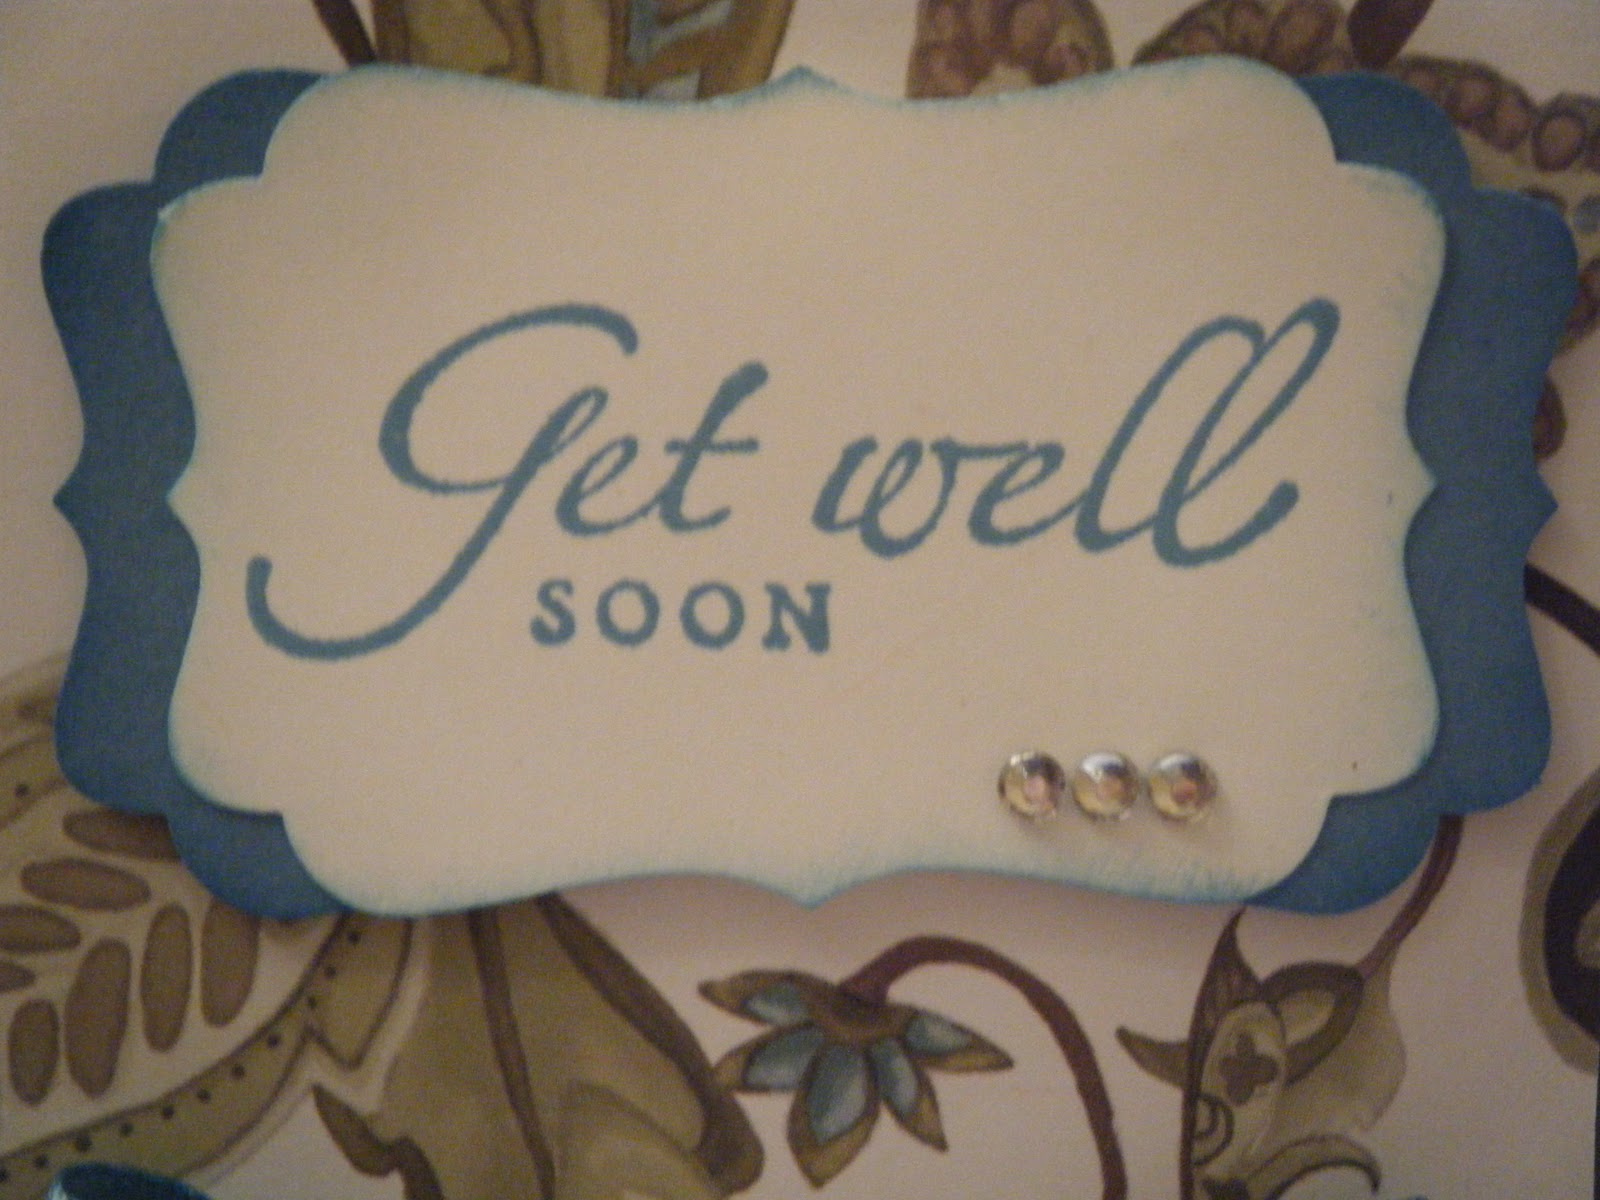
Hi everyone, I wanted to share this Get Well card with you. I made this for one of my regular card class ladies, who has been feeling under the weather recently.


I made this card using the Paisley Petal Designer papers. I love these papers. the colours are so rich and there are lots of different colours in the papers, so you can choose your own favourites for the base card and detail. There is also a matching Paisley Petals stamp set, but I haven't used it on this card.

I used Always Artichoke for my base card and Marina Mist for the ribbon and the card behind the greeting, which was stamped with the Sincere Salutations stamp set and punched out with the Decorative Label punch. To get the 'double layered punched effect'  I punched  a label in Marina Mist and then cut it in half. You can then place it behind the stamped label, to give it a coloured base which helps it to stand out.

I used Marina Mist ink, so it all matched, and added a bit of bling in the form of  3 Rhinestones.
 

I also decorated the inside of the card by using the Scallop Trim Border punch on Whisper White card and stamping it with the butterfly from the Creative Elements stamp set. I love this butterfly and you will see it on some cards soon.


I hope you liked today's card. I've had a bit of a session so will have more to share with you over the next few days. Hope to see you back soon and remember, if you want any of these goodies for Christmas, contact me before the 7th December. x


Saturday, 26 November 2011

Advent Calender - on a tree

Hi everyone, I have finally been able to buy a small Christmas tree, as they've started appearing in the shops. So, I thought I would show you what the advent calender looks like, on a tree. I actually think it looks much nicer on the tree, than on the stand. What do you think?


Remember, you can buy this advent calender as a kit for just £15. Just contact me. I have been really busy making things for yet more craft fairs, so I don't have any cards to show you at the moment. Instead I thought I'd share some of the fair pictures with you. The quality isn't great as it was quite dark and I was really only taking some quick pictures so that my husband, who is doing a fair for me on his own, would have an idea how to set it up.


Posted by Picasa

This display cabinet shows some of the projects we have made in card classes. If you're interested in joining us, just contact me. There are still some spaces left for Wed 7th December 7.00-9.30pm.


Only 1 fair left to go and then I may have some to craft for myself. Mind you, we have loved the fairs and have met some lovely people. Next year I'll be more organised and we'll make the projects throughout the year. Not just in the last 3 weeks. See you soon. x

Saturday, 12 November 2011

A Fair, a Class and a Postponement

Phew! What a hectic few days I've had. For a variety of reasons I had to postpone the Delicate Doilies class, which should have taken place on the 9th of November. This class will now take place on the 23rd of November 7.00-9.30pm. The cost is £12 as usual and the class will be held at my house. Here is a sample of what we will be making:


Everything is included in the price except adhesives, so come and have some fun. Email me at mapleleafstampin@yahoo.co.uk or phone me on 07970 708348 if you want to join us.

Yesterday I had a stand at a ladies pamper evening in Toton. It was a great evening and I met some lovely ladies. The wine seemed to flow endlessly and everyone seemed to be enjoying themselves. If you are one of the ladies I chatted to, then welcome to my blog. I hope you find some inspiration here.

Lastly, it was the all day Christmas class today. The ladies managed to complete all of the projects within the allocated time, so well done everyone. Everything looked lovely, but as per usual, I forgot to take photos on the day so here are a few you may have seen before:


The cards and banner above were made using Real Red, Old Olive and Very Vanilla cardstock and the Perfect Pennants die and Big Shot.


This is a Gift Card Holder. I have based this on one made by a demo called Monica Gale. Have a look on her blog for details:


I  used Soft Suede, Crumb Cake and Whisper White cardstock and inks and the Serene Snowflakes, Dasher and Tags Til Christmas stampsets.

I hope you have a great weekend. See you soon. x


Friday, 11 November 2011

Advent calender kit

Apologies (again) for having not blogged for a while. This is my first Stampin' Up! Christmas and I can't believe how hectic it is. There seem to be so many Fairs to go to, as well as classes and parties. Not that I'm complaining mind you, it's good to be out there spreading the Stamping word...

Today I wanted to share this advent calender with you:


I have made 24 mini milk cartons using the Mini Milk Carton die and the Big Shot. I cut them out alternately in Wild Wasabi and Real Red cardstock. I then glued a 1" strip of Holly Berry Bouquet designer paper around it and cut a scalloped circle using the Scallop Circle Punch and a Very Vanilla circle using the 1 3/8" circle punch.


The numbers were cut using the Timeless Type Junior Alphabet Sizzlets dies and the Big Shot. The circles were fastened to the mini milk carton with a Dimensional.

A clip was fastened to each carton and a piece of Real Red 1/8" Taffeta ribbon was threaded through.


I happened to have a stand that I could use but, as not everyone has this, I've also hung it from some twigs from the garden.

The boxes can be filled with anything you want (as long as it's small enough) eg sweets, chocolates, small toys like erasers, jewelry, hair slides etc. The calender can be used again and again as long as it's packed away carefully as opening the boxes does not damage them.


If you would like to make one of these, contact me to buy the supplies, or if you prefer not to buy the products, I have these available as kits. The kit includes everything except for the glue. Cost is £15.00 if collected from me, or £17.00 if it needs to be posted.

Monday, 31 October 2011

Delicate Doilies

Hi Everyone, I'm doing a workshop on Wednesday for my good friend Heather so yesterday I was preparing what I'm going to demo. I've had the Delicate Doilies stamp set since September when I got the chance to pre-order in preparation for the new catalogue launch. Although I've had it all this time, and the Flirtatious papers that match the stamps, I've not had a play until now. So this is what I created:


These are just a few quick mini cards that can be used for any occasion. I used Wisteria Wonder, Pool Party and Whisper White cardstock plus the matching inks. I also used the fabulous new Doily Triple Layer Punch and the 1 3/4" circle punch.
 And once I got started, I couldn't stop. I created lots of the same design card in different colourways to show the potential of this stamp set. Here you go:


The combinations I used are: Wisteria Wonder/Pool Party; Certainly Celery/Wild Wasabi; Crumb Cake/ Soft Suede; Melon Mambo/Daffodil Delight; Calypso Coral/Peach Parfait; Not Quite Navy/Cherry Cobbler.

Then I thought, wouldn't this be a great way to show people the potential of stamp sets when I do workshops? Often there isn't space to put up display boards, so this is a great way to circulate samples. I've tied it all together by cutting a Top Note on the Big Shot in Pool Party and used the gorgeous new in-colour Ruffled Ribbon to make my bow.


I'm now planning to do this for all the stamp sets I have, showing their potential. I'll show you the others as I do them.

Now then, back to Wednesday's workshop. I'm also making Heather a box in a bag to keep the cards in. I'll show you the finished article after the workshop - that is if I remember to take a photo as Heather will be getting the set as a hostess thank you gift, for hosting the party. If you would like to receive something similar and have the chance to earn free goodies out of the catalogue, contact me to host your own worshop/party.

If you would like to have the chance to make your own projects, using Delicate Doilies then join us at the next cardmaking class on November 9th.

See you soon. x

Sunday, 30 October 2011

All day Christmas Class 12th Nov - more pictures

Hi all, at long last here are some more pictures of the all day Christmas class. I have finalised the details and we will be making these:


Not forgetting the Santa and Rudolph gift boxes, I showed you before. So, to sum up we will be making:
A banner
2 banner cards
2 Dasher cards
A Dasher gift card holder
Santa and Rudolph gift boxes

Here's a collage of all of it. The colours look a bit dark in the photo but are lovely in real life:


Remember you get plenty of stash to make all the projects plus plenty to take home. These projects have been inspired by the work of 2 very talented demonstrators - Monica Gale and Jenny Moors - check out their blogs for more inspiration.
If you fancy having a go at making these projects,then contact me ASAP. I've extended the booking deadline to November 2nd so let me know if you are interested. Hope to see you on the 12th. x


Thursday, 27 October 2011

All Day Christmas Class 12th November

Hi everyone, I know I've been taking about the All Day Christmas class for ages but I thought it was time to show you a few of the things we'll be making. These are gift boxes which double-up as Christmas tree decorations. They are great fun to make, so come and have a go.

Here's Santa:


Rudolph:


You get to play with the Big Shot, the dies and the embossing folders so what are you waiting for? Ofcourse, these aren't the only things we'll be making. We'll also make a variety of cards and some other fun projects. I'll show you some more sneak peaks later.

Remember the cost is only £30 for all the materials needed (except glues). You do need to book and pay before the 31st October, so don't hesitate. You can contact me on 07970 708348 or mapleleafstampin@yahoo.co.uk.  I hope to hear from you soon. x
Posted by Picasa